|
|
|
|
Chapter 1: A Simple Level by Tom Smallwood Objective: This guide will walk you through creating your first level for the Wheel of Time. Getting Ready: The first thing you need to do is load the wheel of time editor. It should be on the start menu by your Wheel of Time icon. If you did not install the editor when you installed the game, you will have to do so before continuing. Screen Layout
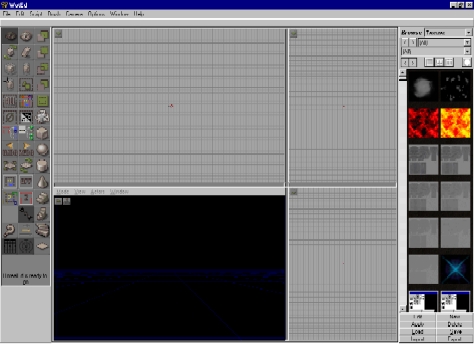
The screen is divided into 3 sections. Following is a quick explanation of each. I will go into more detail later. On the left side of the screen is the Tool Pallet. It consists of 3 columns full of icons. This is where you will find all the things you need to build hallways, rooms and walls. In the center of the screen are 4 Editing View Windows. They show your level from different angles. Going clockwise from the top left we have the Top View (looking down on the level), the Front View, the Side View and finally the 3D Preview. On the right side of the screen you will see the Object/Texture Browser. This is where you select objects such as tables or chairs. You also select textures for your levels here.
Loading textures When you play through a Wheel of Time level and look around, you are seeing textures painted on 3D objects. Look at the ground and you might dirt. A wall may look like brick. As you played the game, you probably noticed that even though a brick wall might look like it has grooves around the bricks, it is really just a flat surface painted to look like bricks. It is the texture that gives the wall depth. Textures come in many types such as bricks, wood or dirt. When you build your level, you will paint the walls with these textures. To make textures easier for you to select, they are usually grouped along common themes. For example, the textures used in the Shadar Logoth levels at the beginning of the game are in a file called MordethT.utx. Before you start editing a level, you should decide what textures you want to use. For this guide, you should use the Shadar Logoth textures. At the top of the texture browser, you will see the word Browse. Next to it is a pull-down field. The field should already say 'Textures'. If it doesn't, select 'Textures' from the pull-down list. At the very bottom of the texture browser is a group of 8 buttons, one of which says Load. Press the Load button so you can find the MordethT textures. 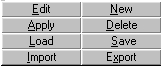 In the Load Texture Package dialog window, find and select the MordethT.utx file. Once selected, you should see two columns of textures on the browser. You can scroll these textures up and down with the scroll bar on the left. Scroll through the textures and find a good brick texture for the level. Once you see one you like, click on it and it will highlight. To pick a different texture, simply click on a different image.
Creating a room Now, we are going to create a room. On the Tool Pallet, select the cylinder. It is in the 3rd column, 9th from the top.
Click on it and you should see a red cylinder appear in each Preview Window. If you do not see the the red cylinder, select Camera from the top menu and then Reset All. This red cylinder represents the shape and location of the room you are about to create. It is not the room itself. If you wanted to change to size of the room you should do it now, before you create it. For now, leave leave it just the way it is. To create the room, you need to hollow out the cylinder. To do this, click on the Subtract Icon on the Tool Pallet (3rd Column, 2nd down).
Rebuilding the level After you hollow out the room, you need to rebuild the level. To do this, press the F8 key and press the rebuild geometry button at the bottom. Always make sure you remember to rebuild before you run the level or it will not work correctly!
Creating light If you have been looking at the 3D Preview window during this process, you may have noticed when you hollowed the room, you could see the textured walls. After you rebuilt the geometry, however, they disappeared. Actually, they are still there, it is just to dark to see them. To add some light to the room, RIGHT click in the room in the Top Preview area. A menu will pup up. Select the Add Light Here option. You should see some walls light up in the 3D Preview window.
Player Start Finally, we need to select a place for the player to start in the level. In the Object/Texture Browser, next to the word Browse, select Classes. A listing of available objects will be displayed. Click on the '-' symbol next to the NavigationPoint entry. A sub-list will open up giving you more options. Click on the PlayerStart entry so that it is highlighted. Now go back to the Top Preview window and right click in the room again. A new entry will be on the menu, Add NavagationPoint here. Select it and you will see a small object appear representing the place where the player will start in the level.
Ready to Play Your level is now ready to play. Before you do, however, save the level. Go to File, Save. Give your level a file name and press OK. Once your level is saved, select Play Level from the file menu.
Next This is a very basic level. It is only one room, there is no way to end the level and there are no monsters to fight or items to find. The textures on the floor and walls are the same and it looks nowhere near as good as a level in the actual game. We will go over more of this in future tutorials. The next chapter will discuss moving around in the preview windows and working with the interface of the editor. We will also modify some textures, add a dome to the ceiling and a second room. Chapter 1: A Quick Level If you have questions or comments about this tutorial, please address them to Editing@wheelgame.com.
|
|
This site is not made by, and is in no way sponsored by, Legend Entertainment or GT Interactive. |